This article will take you through the proper setup and linking process for Facebook accounts to ensure reliable posting. If you are troubleshooting an error, such as "Insufficient Permissions", reviewing these steps may help resolve it.
1. Checking if you have "Select All" chosen when linking Instagram accounts
When you link an Instagram account, you'll want to always click "Select All" ONLY when you are redirected into Facebook. To check if you have that already selected, follow these steps:
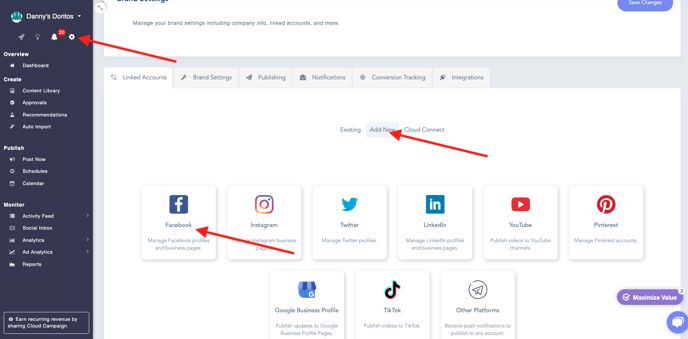
Navigate to brand settings. Next click Add New, then on Facebook.
Once this screen pops up, click on Edit Access. If you don't see this page, and are automatically directed to the Cloud Campaign linking page, follow the steps in this article to reset your Meta permissions. Then restart from step #1 here.
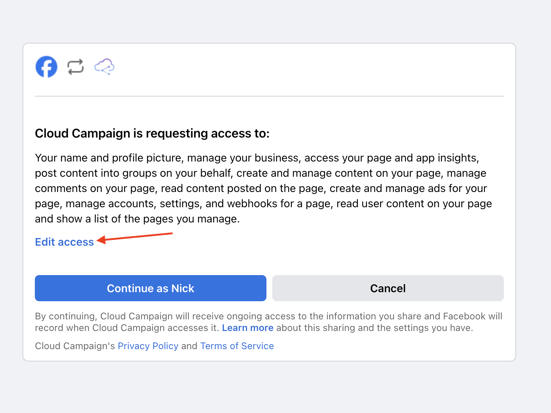
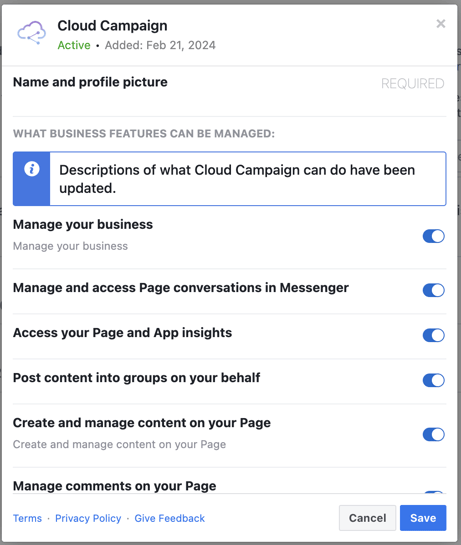
When you arrive on this page, make sure to click "Select All" for each permissions listed here.
NOTE: It's important to note this process will not link all of these accounts to Cloud Campaign. When you get to the final step of linking a Facebook account, and are redirected back to the Cloud Campaign linking page, at that point you would only select the account(s) you want linked to that workspace.
If you've noticed that a Facebook page is missing when you go to link that page, the steps above will help resolve that.
Next we'll check the Business Integration Settings for Cloud Campaign. Navigate to facebook.com, and be sure you're logged in as the personal FB account that has admin access to your Pages. Click your profile icon in the top right corner, select Settings and Privacy, then select Settings
Scroll down on the left side menu, and select Business Integrations. Click on "view and edit" next to Cloud Campaign. Then, ensure all toggles are turned on. If you see lists of accounts below any of the permission toggles here, you will need to select the box in the top right of that list to enable permissions to all accounts!
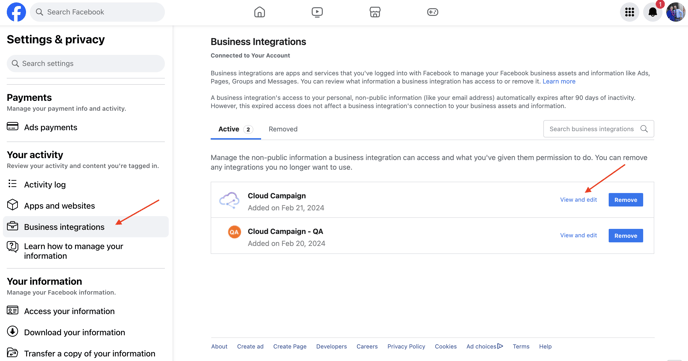
Once you have verified all of the Business Integration Settings have been turned on, click save and close the tab. Next, attempt to link your Facebook account again.
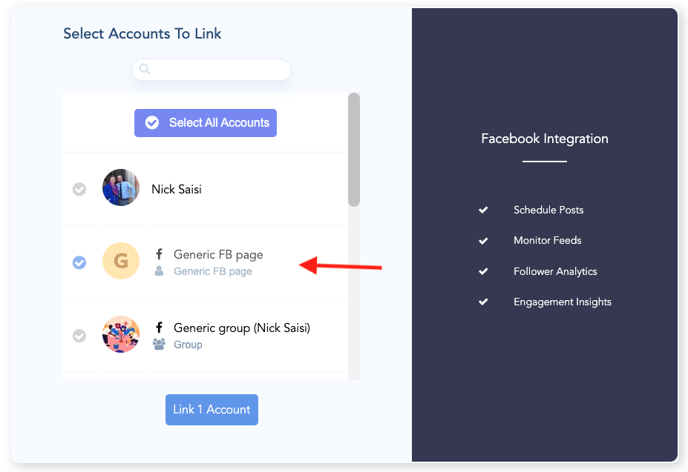
Once you are here, you will select the account(s) that should be connected to this brand workspace.