How To Create and Automate a Schedule
If you're looking to save yourself and your business time, creating a schedule and auto-filling it with content is a Cloud Campaign must! In the steps below, we will walk through how to create a weekly schedule, and then set it up to automatically publish your content based on the criteria you set.
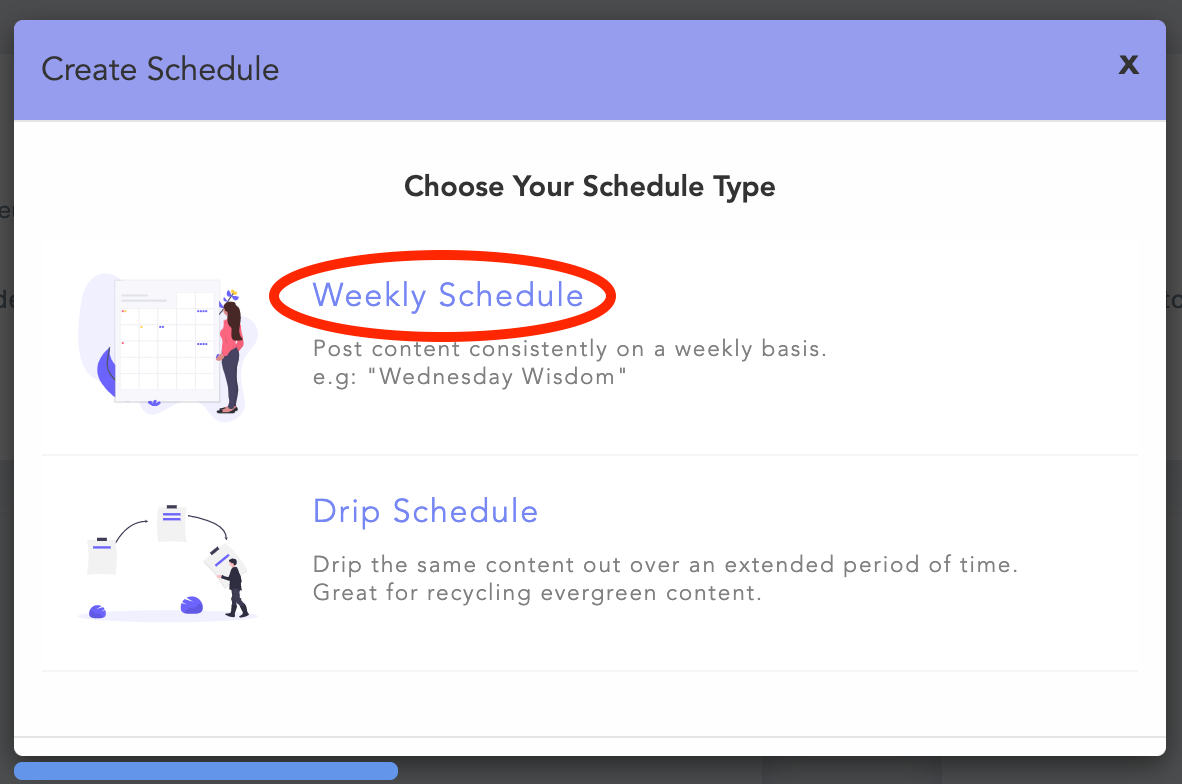
Create a Weekly Schedule
Go to Schedules on the left-hand menu and click Create Schedule

When prompted, select Weekly Schedule
Give the schedule a title and choose the time(s) and day(s) that you want your content to publish. Click Create Schedule to save

Note: You can add multiple time slots per schedule! Just click +Add another time
Automate a Schedule with Categories
After you save your schedule, a new window will pop up with an option to Auto-Fill This Queue. This is the most important step for automating your posting!
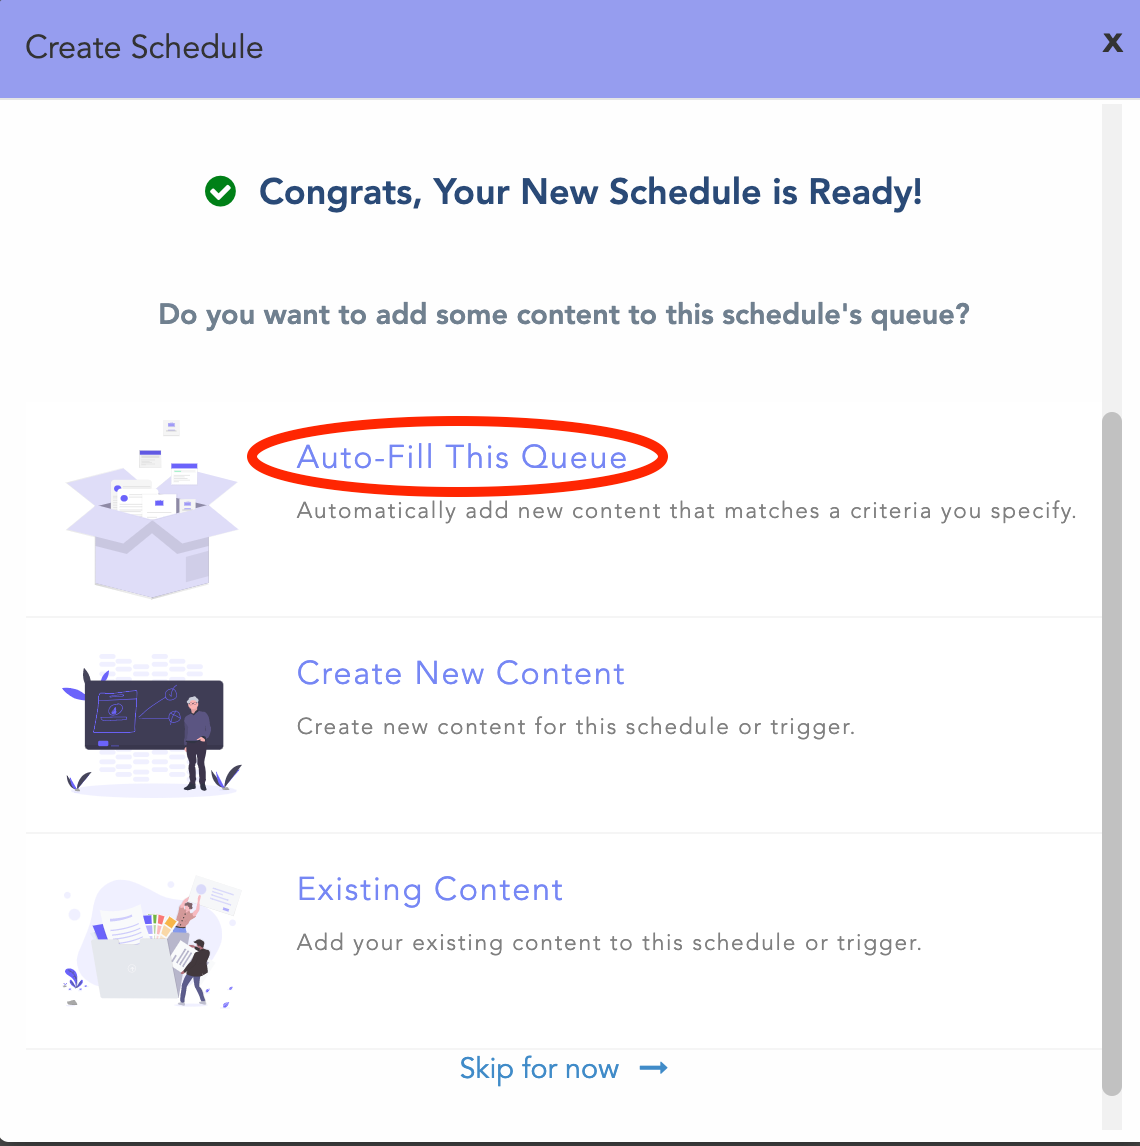
Check the Auto-Fill This Queue box when prompted, and under Any Category, select the category you want your schedule to automatically pull content from

Select the social accounts you want this schedule to post to. Keep in mind, if you leave this section as Any Account it will post to the social accounts determined by each individual piece of content
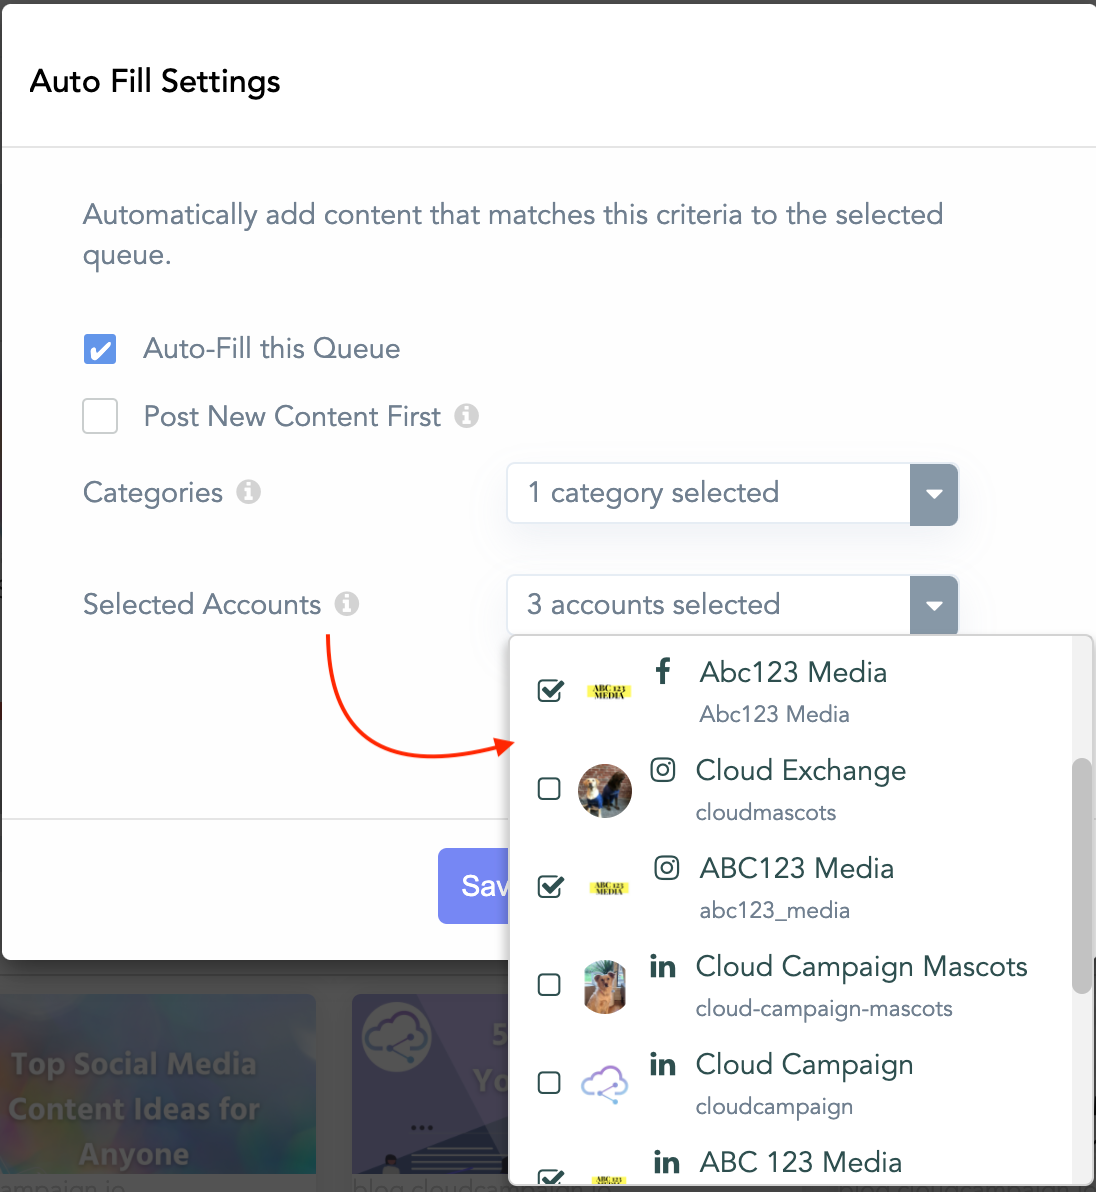
Click Save Settings

You can now view your categorized content in the queue. If you navigate to your calendar, you should see posts scheduled in accordance to your schedule timeslots. As you create new content and categorize it, it will automatically be added to the appropriate "Auto-Filled" queue.
###Auto-Filling an Existing Schedule
If you have an existing schedule that you would like to automate with a category...
Make sure you are on the Queues view in your schedules
Click + on the left-hand side of the desired schedule
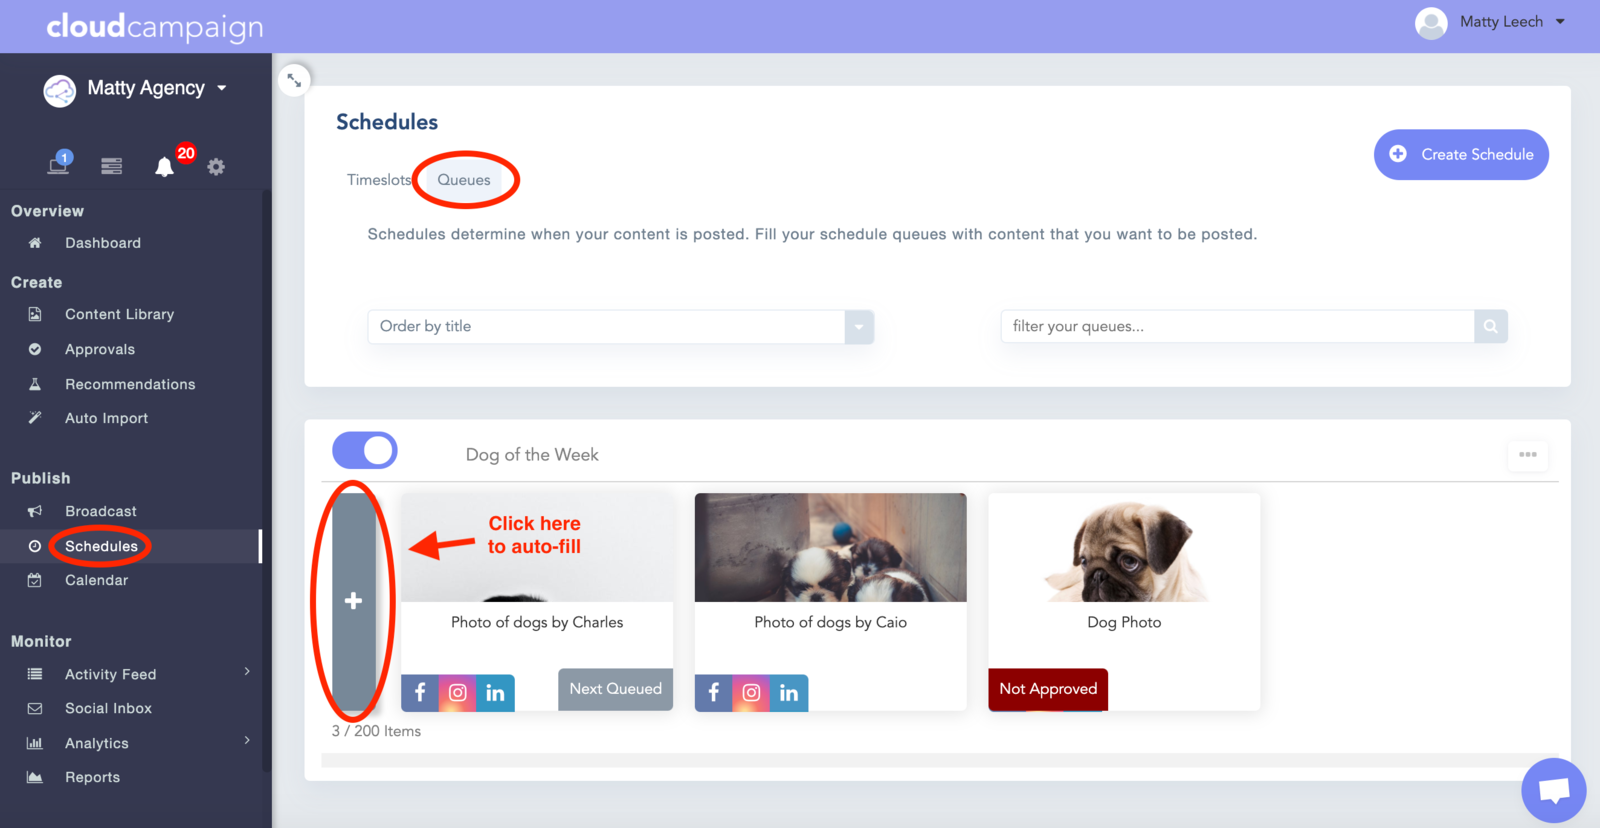
Select Auto-Fill This Queue

Follow steps 2-3 from the section above to configure your schedule to automatically pull in categorized content!