For Vendasta users to get access to Cloud Campaign, users will automatically get access to Cloud Campaign when added as a user in Vendasta.
To add a user to an account:
- Go to Partner Center > Businesses > Accounts.
- Find the account you want to add the user to. If there are no users assigned to the account, you can click the Add User icon
 next to the account name.
You can also click on the account name, scroll to the Users section, then click Add Users.
next to the account name.
You can also click on the account name, scroll to the Users section, then click Add Users. - Select the user to add to the account.
- If the user already exists:
- Find the user in the list.
- Click the checkbox next to the user.
- Click Add User.
- If the user doesn't exist:
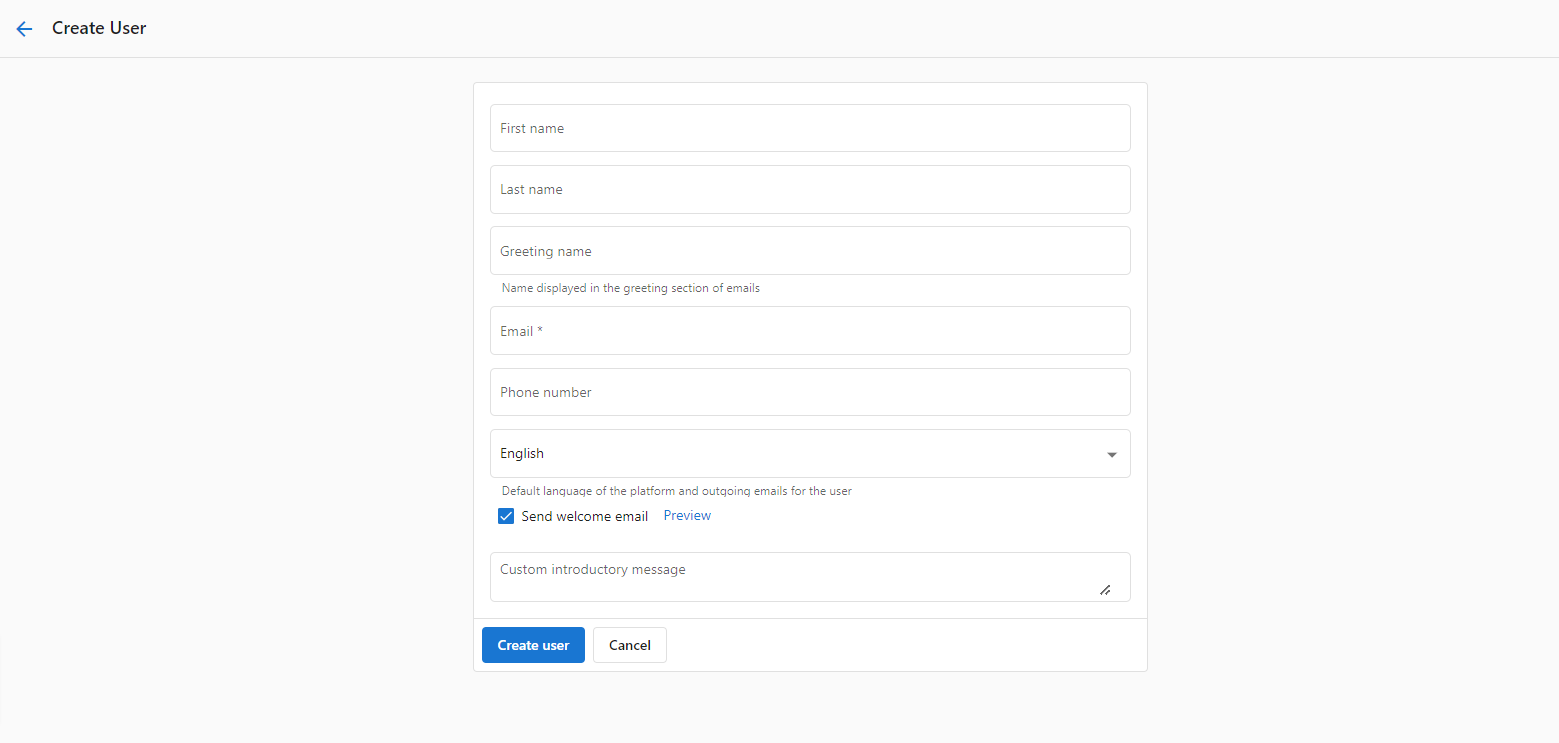
- Click Create New User.
- Complete the form with the user's information:
- First name
- Last name
- Phone
- Welcome message
- Select whether you want the platform to send a welcome message to the user.
If Send Welcome Message is selected, the platform will send a welcome email to the user. This email contains a link to log in to Business App. Upon clicking this link, the user can set their password.
- Enter a custom message for the top of the welcome email (optional).
- Select whether you want the platform to send a welcome message to the user.
- Click Create User.
- If the user already exists:
The user will now be assigned to the account.